How to Set Up a Church Merchandise Store Using Planning Center Registrations
Many churches create their own merchandise—t-shirts, mugs, hats, and more—but struggle to find a simple, cost-effective way to let their congregation purchase it. If you're looking for a way to sell church merch online without setting up a separate store on platforms like Square or Shopify, Planning Center Registrations offers a powerful solution.
With built-in payment integration via Stripe, and flexible signup options, you can create a merchandise store that’s easy to manage and even easier for your church members to use. Even if your merchandise is free, this method provides an easy way for people to sign up for the items they wish to receive. Whether you're selling items or giving them away, this guide walks you through the best way to set up your church merchandise store step by step.
Step 1: Create a New Signup
Start by logging into Planning Center Registrations and selecting “Create a New Signup.” During setup, you’ll be asked:
“What are you creating a signup for?”
Choose “An ongoing program or opportunity.”“What kind of registrations do you want to collect?”
Select “Simple Signup.” This option collects one contact person per order, making it ideal for merchandise sales.To Set Your Currency—even if you’re not collecting payments, this step is required.
To Name Your Signup. Click Save to finish setup. Your new registration will open and allow you to customize your configuration.
Step 2: Configure Your Store Settings
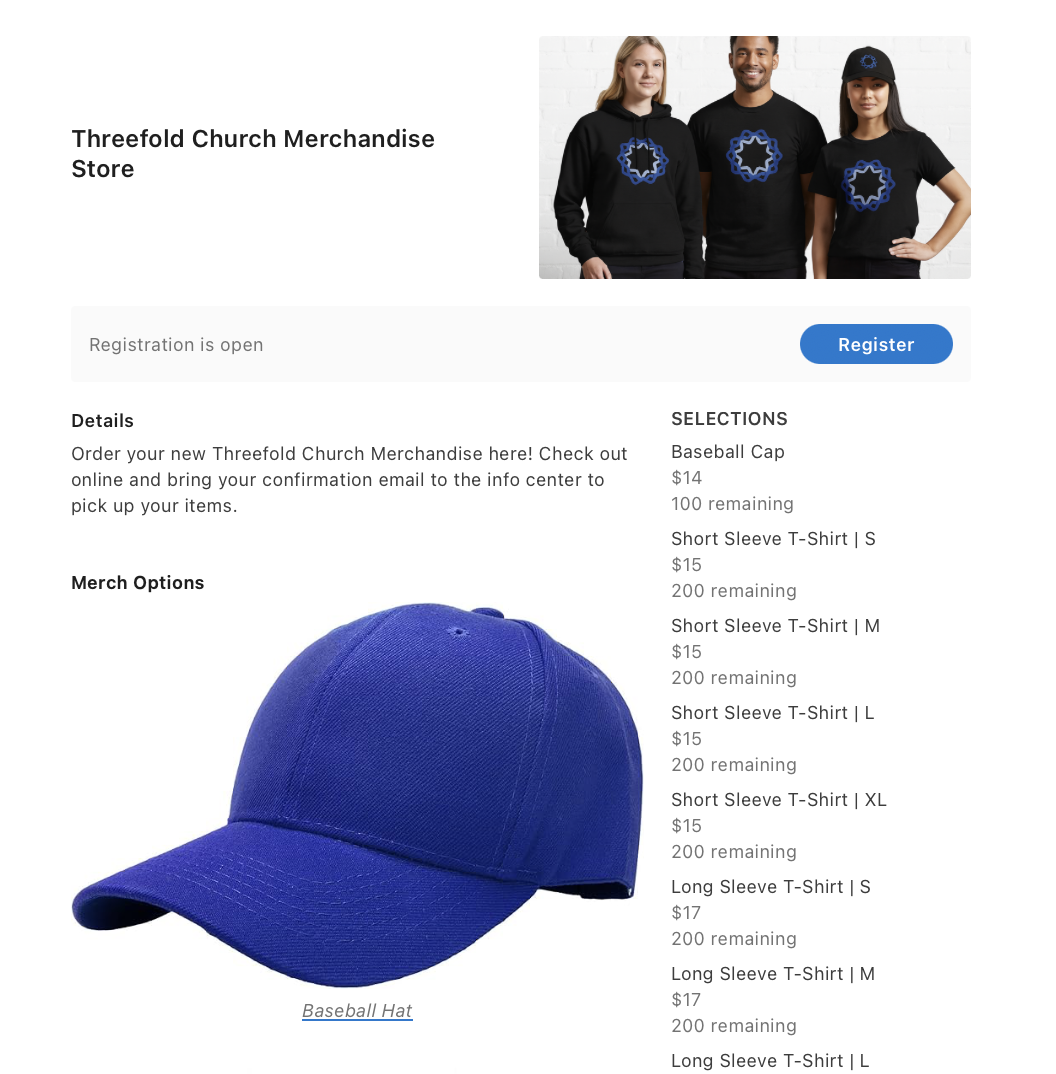
On the About page, you can:
Upload an image to represent your store
Add a description of your merchandise
Assign a location, campus, and category
Add contributors who can help manage the store
💡 Tip: Include item images in the description to give buyers a visual preview of your merch.
Step 3: Create Selection Types for Each Item
This is where your church merchandise store begins to take shape. Add a Selection Type for each item you’re offering. You can include:
Item name
Description
Price
Size options (recommended as separate selections for flexibility)
Using a consistent naming convention (e.g., “T-Shirt – Medium”) makes it easier for buyers to choose the right items.
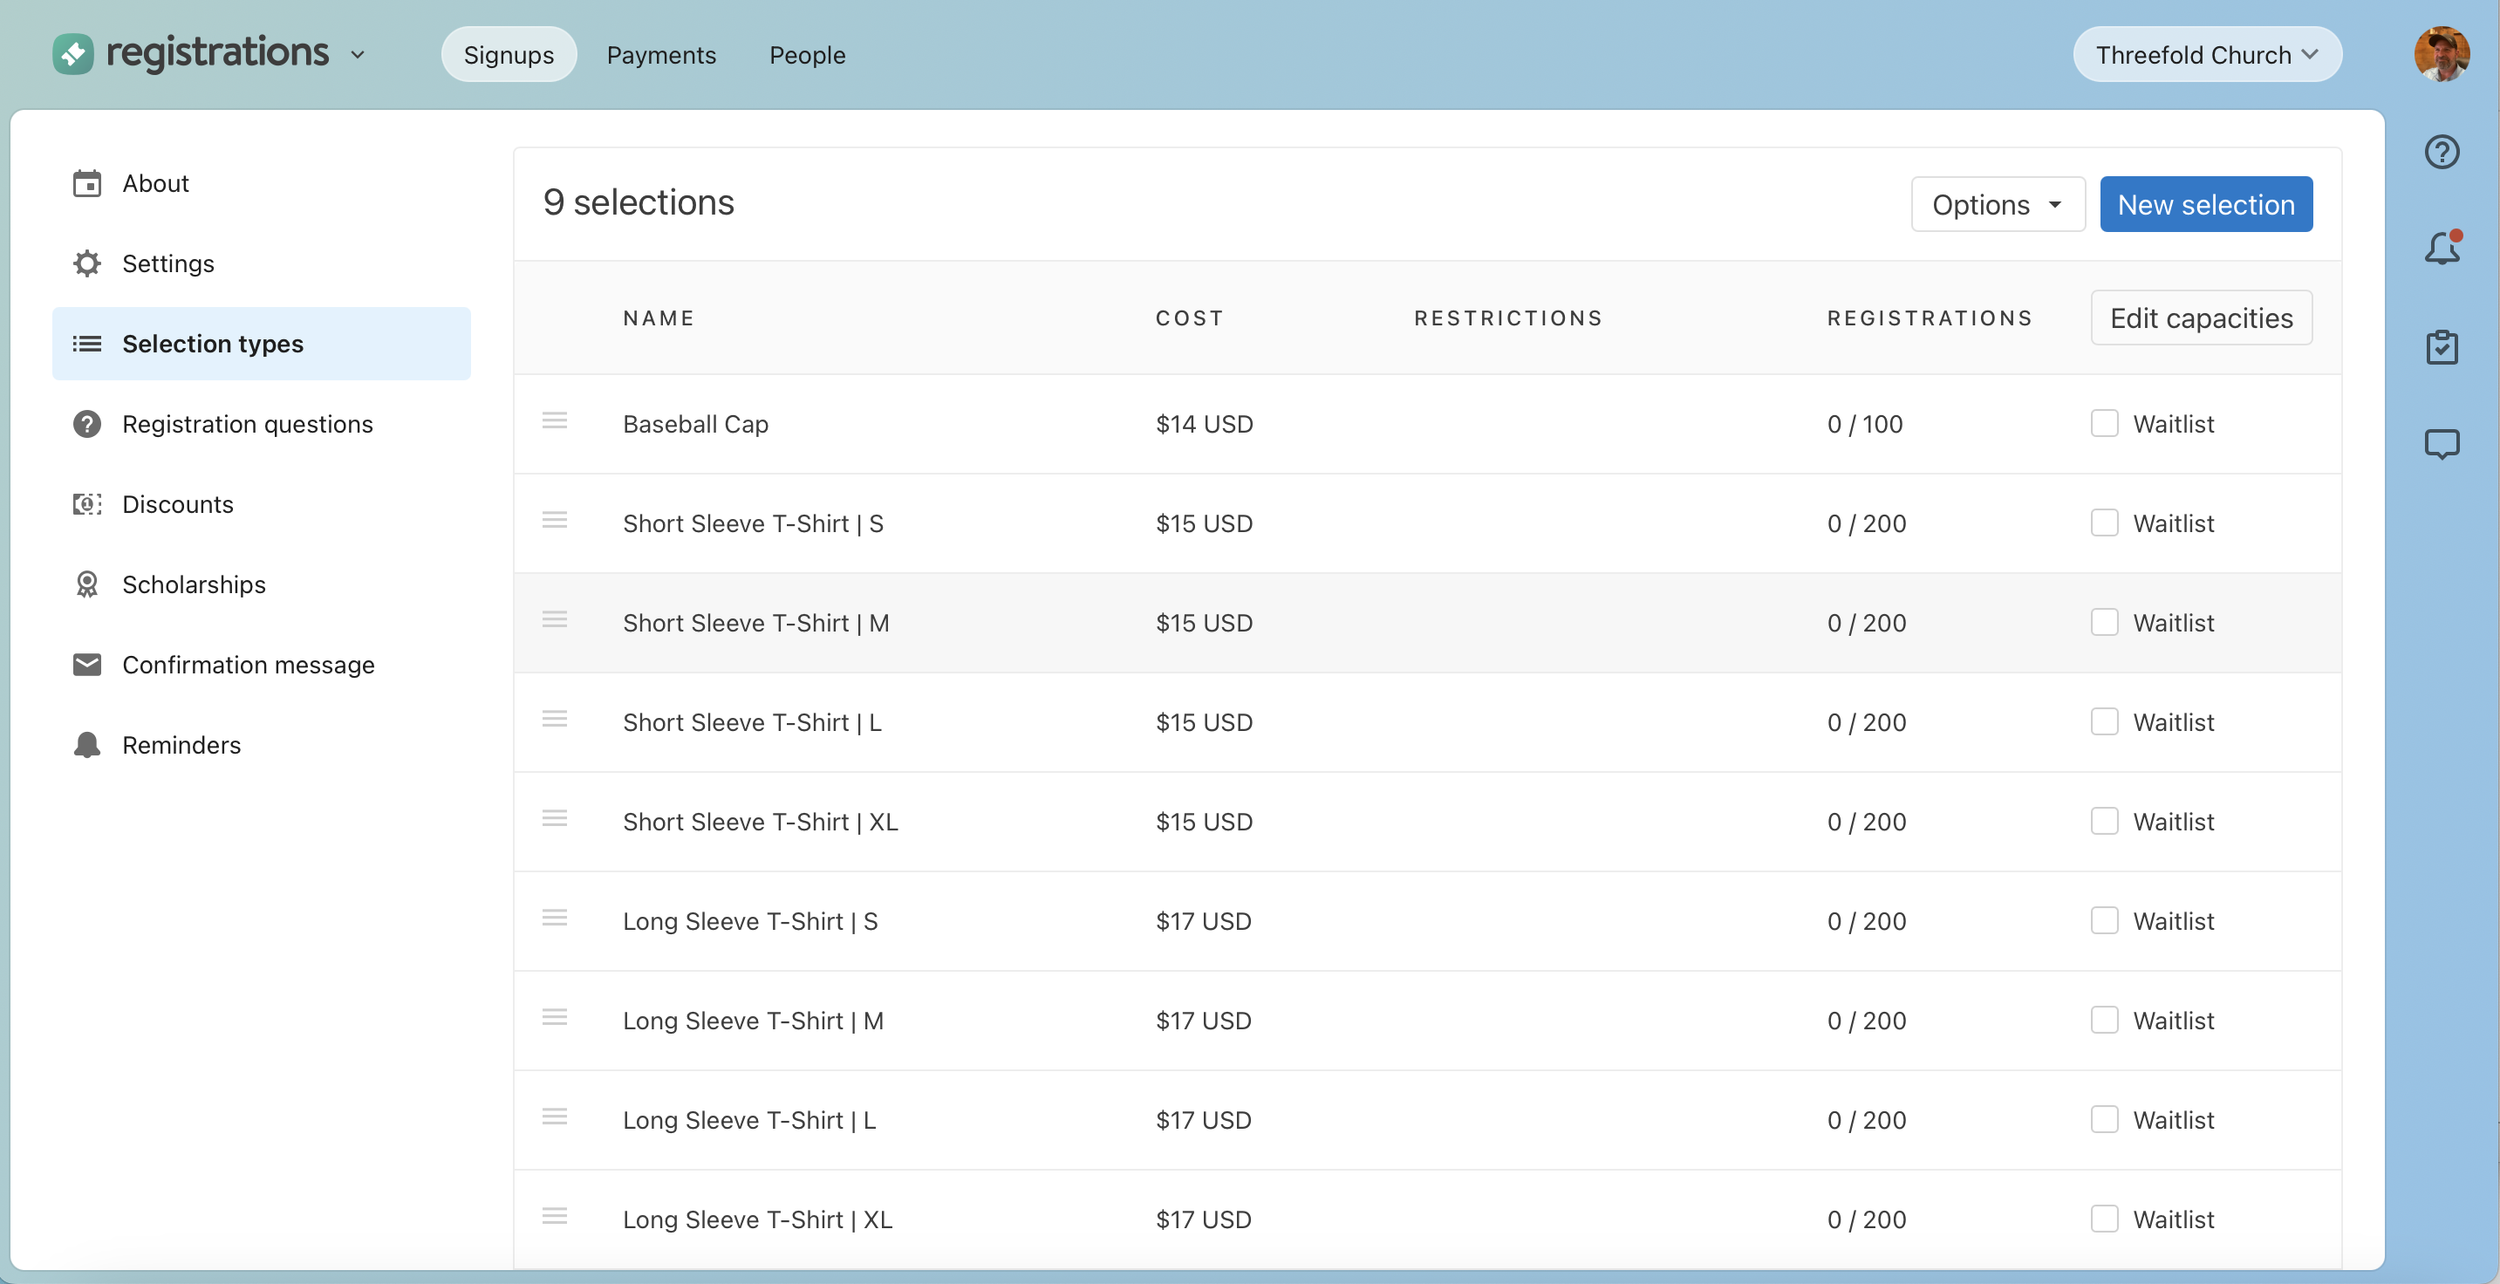
Step 4: Manage Inventory with Capacities
If you have limited stock, use the Capacity feature to prevent overselling.
Click Edit Capacities and enter the quantity available for each item. As purchases come in, Planning Center will automatically update your inventory count.
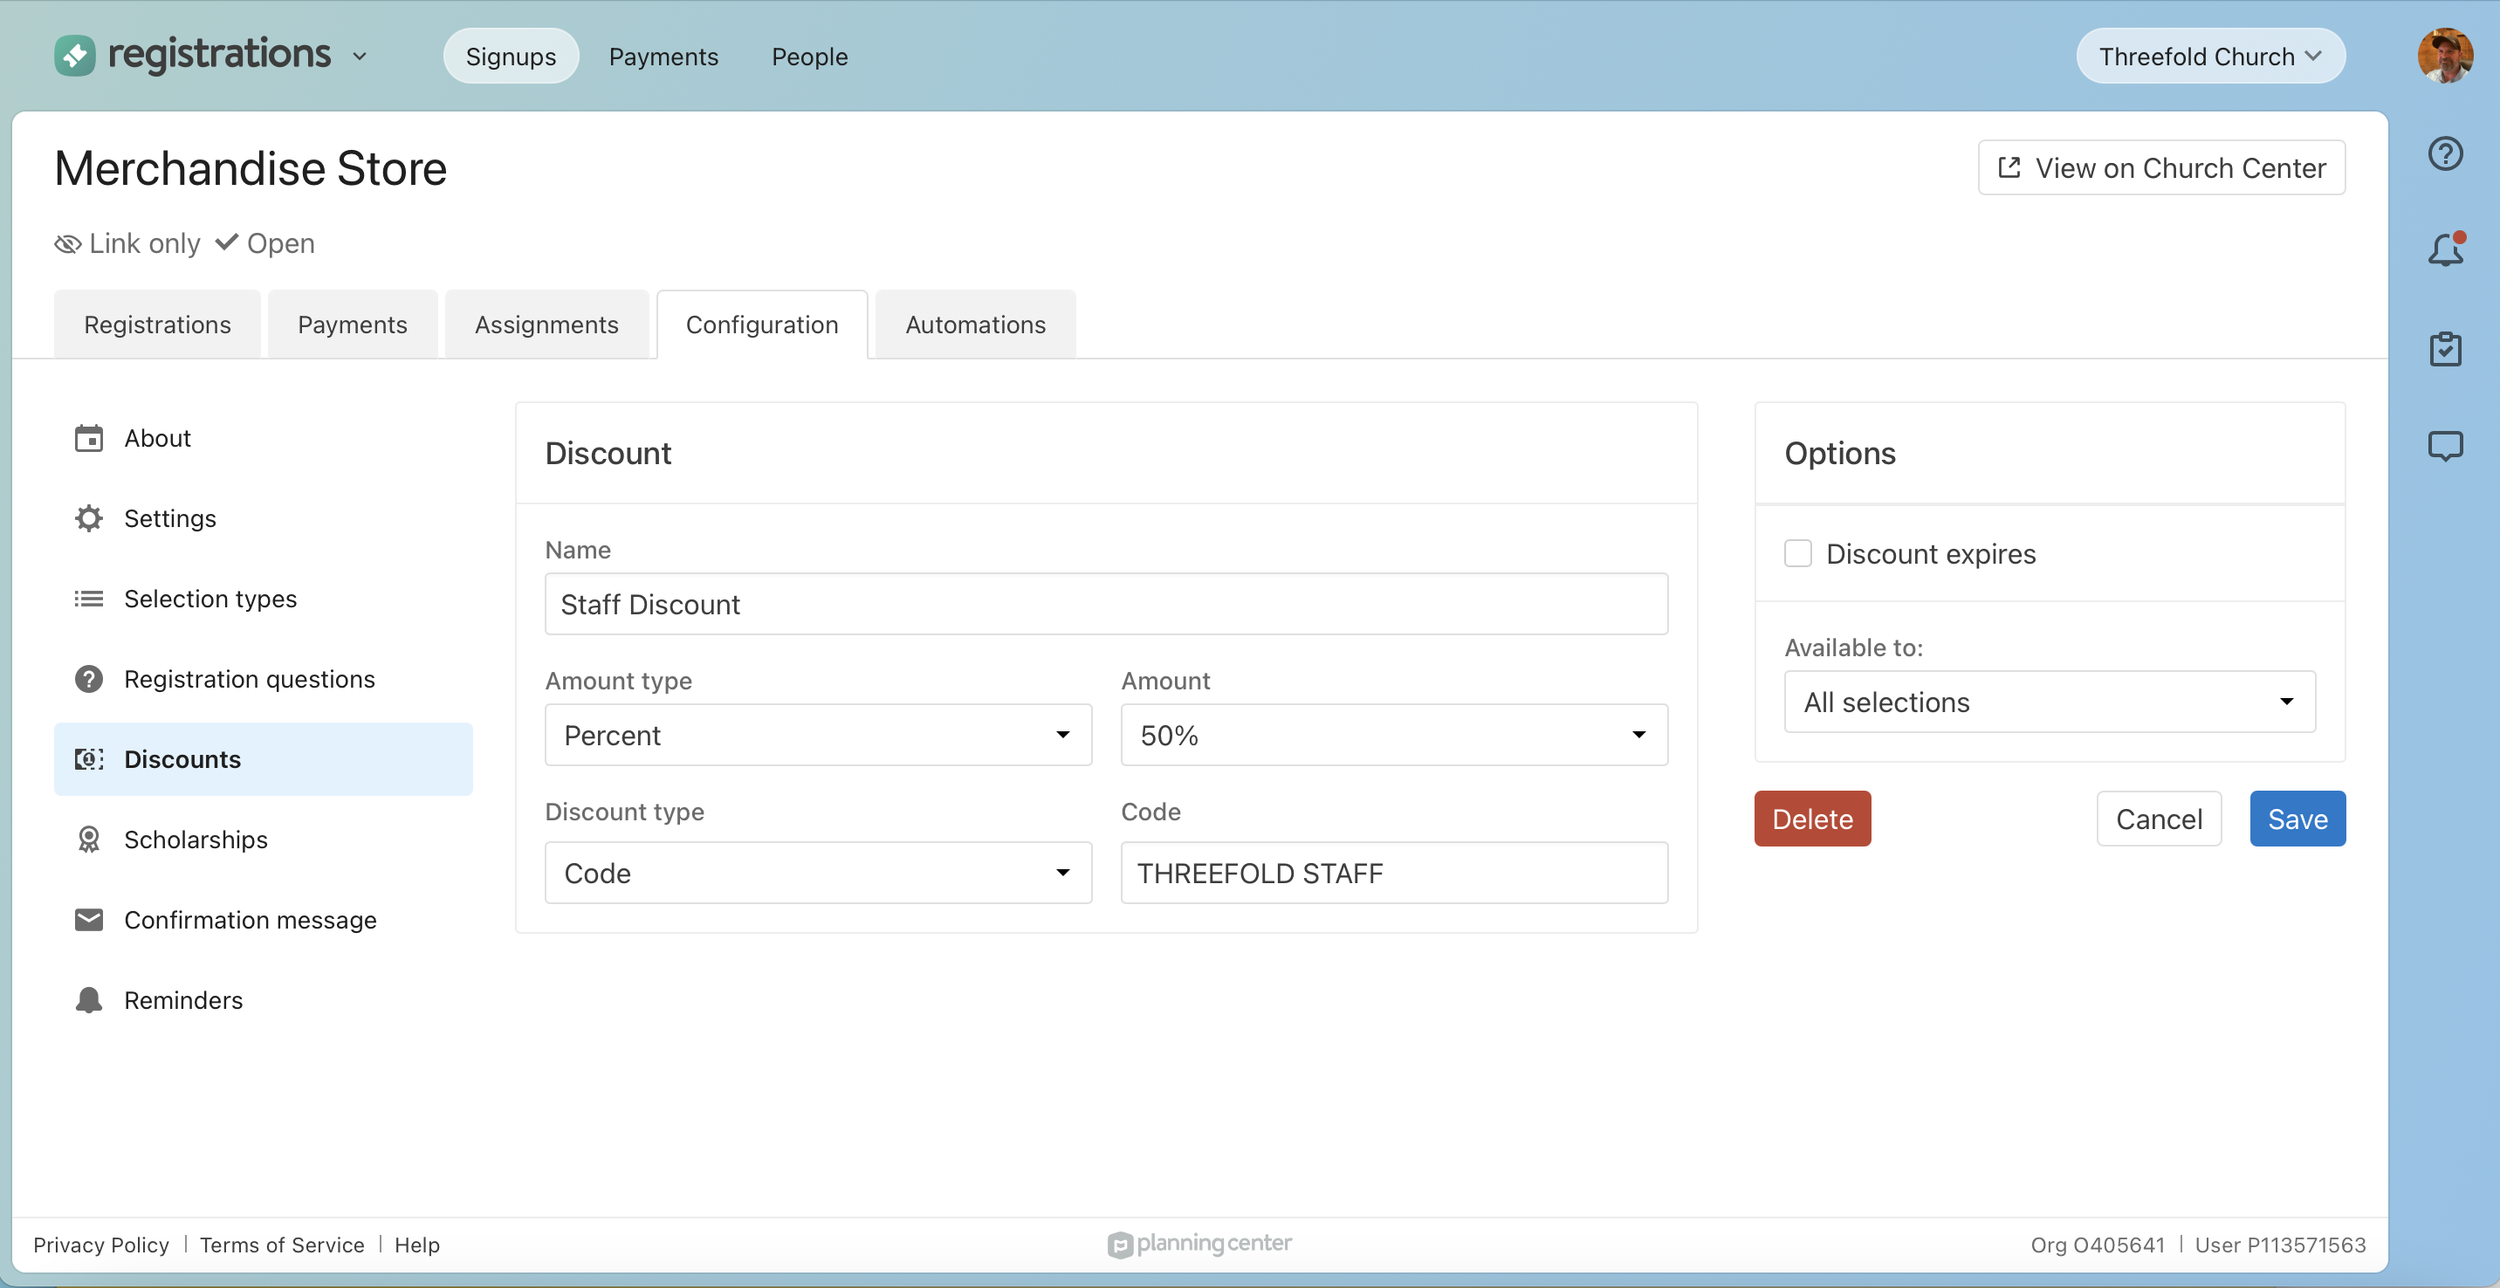
Step 5: Add Discounts for Staff or Promotions
Want to offer early bird pricing or staff discounts? Planning Center makes it easy.
Go to Discounts in the left panel and click Add a New Discount.
Enter a name, choose the amount type (flat rate or percentage), and specify the amount.
Then, use the dropdown to choose a discount type. Here's a quick overview:
Code – Share a promo code for buyers to enter
Group – Offer bulk discounts based on quantity
Early Bird – Set a date-based discount for early purchases
You can also apply discounts to specific items or selection types.
Step 6: Customize the Confirmation Message
After checkout, buyers receive a confirmation email with a summary of their purchase.
Use the Custom Confirmation Message feature to include pickup instructions, contact info, or any other helpful details.
Step 7: Preview and Test Your Church Merchandise Store
Click “View on Church Center” to preview your store. Walk through the signup process to ensure:
All items are visible
Prices are correct
Discounts apply properly
Inventory limits are working
Frequently Asked Questions
“Can I use a detailed signup instead of a simple signup?”
Yes, but it’s not recommended for merchandise. Detailed signups require assigning each item to an attendee, which can confuse buyers and slow down the process.
“What about the Registrations Add-ons Feature?”
Add-ons are only available in detailed signups and are tied to individual attendees. While they work well for event-specific merch, they’re less flexible for general merchandise sales—especially if buyers want to order multiple sizes.
“How do I show pictures of each item?”
Selection types don’t support images directly, but you can include item photos in the description section at the top of your signup form.
“Will I be charged for my test submissions?”
Create a test discount to prevent accidental charges. Set the discount for 100% and use a code that you will share with your test audience (e.g., TEST100). For extra security, consider setting this code to expire before your store goes live.
Conclusion: Launch Your Church Merchandise Store with Confidence
Setting up a church merchandise store with Planning Center Registrations is a smart, streamlined way to serve your congregation. Whether you're selling items or giving them away, this platform helps you manage inventory, collect payments through Stripe, and offer discounts—all without needing a separate e-commerce site.
By following this guide, you’ll create a store that’s easy to use, visually appealing, and fully integrated with your church’s existing systems. Ready to get started? Your merch store is just a few clicks away.
Kristin Emerson
Client Success Specialist, Threefold Solutions