
Struggling to embed a Planning Center Form in your Wix website? I don’t know about you, but reading documentation or how-to guides can be almost as frustrating as the problem itself. If so, I will show you, with pictures (for those of us who are more visual learners), how to embed a Planning Center form into your church's Wix website.
The Planning Center documentation for how to do this is complex for those who do not write software for a living. So, if you are reading this article, you are likely in the same boat. The good news is that I do. So, I will be your software sherpa on this journey. We will make this as simple as possible. For all those non-techy people out there, I ran this article past a few of my analog friends, and they felt confident they could do this for their church. So, let’s get started.
Here are the nine simple steps to embedding a Planning Center form on your Wix website. This works the same whether you are on Wix Studio or the classic Wix editor — custom code lives in your site dashboard, not in the editor, and Wix documents one panel for all of its editors. From Wix Studio, hover the Wix logo at the top left and click Go to Dashboard to get there. Note that Wix requires your site to be published with a connected domain before it will let you add custom code.
Let’s go!
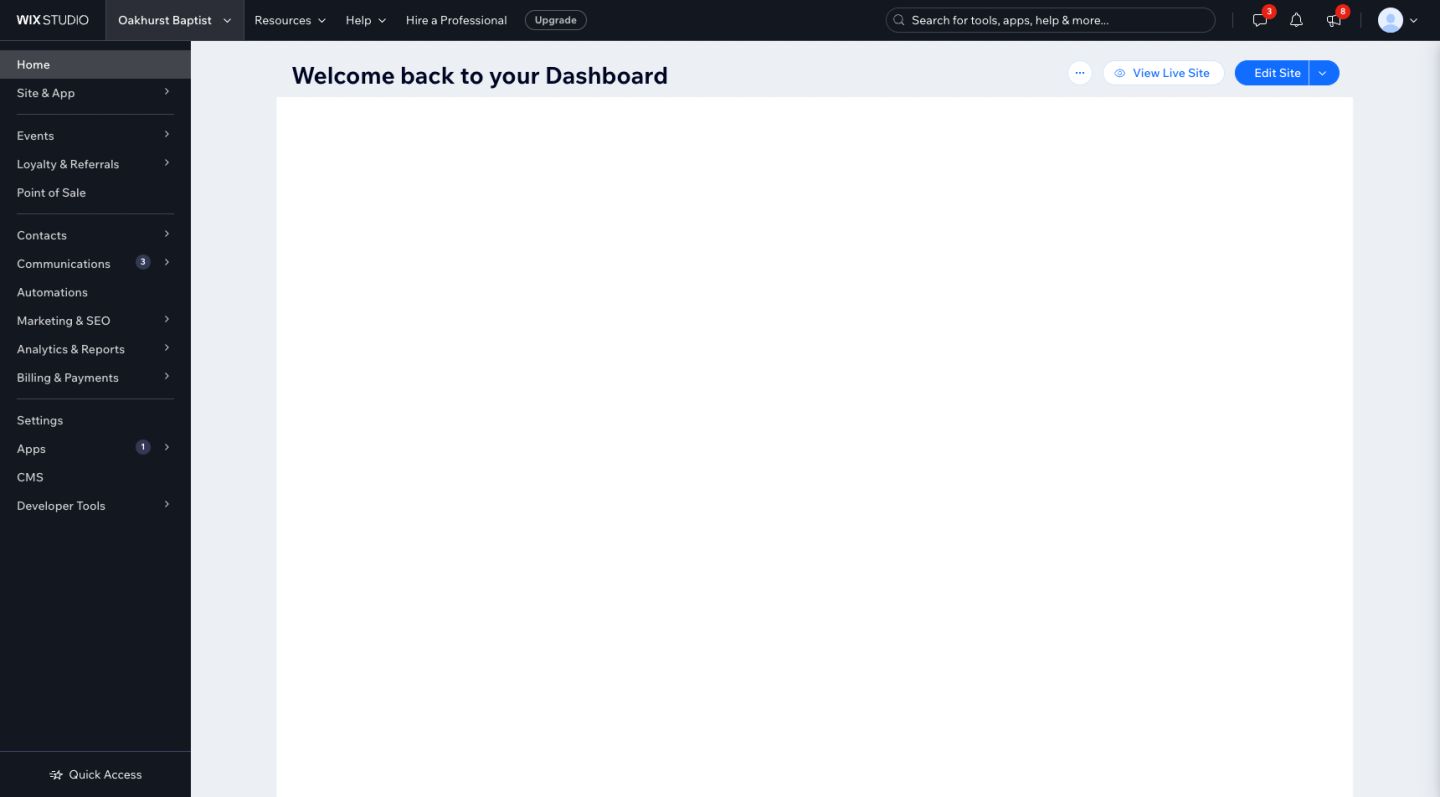
1. Login into your Wix dashboard.
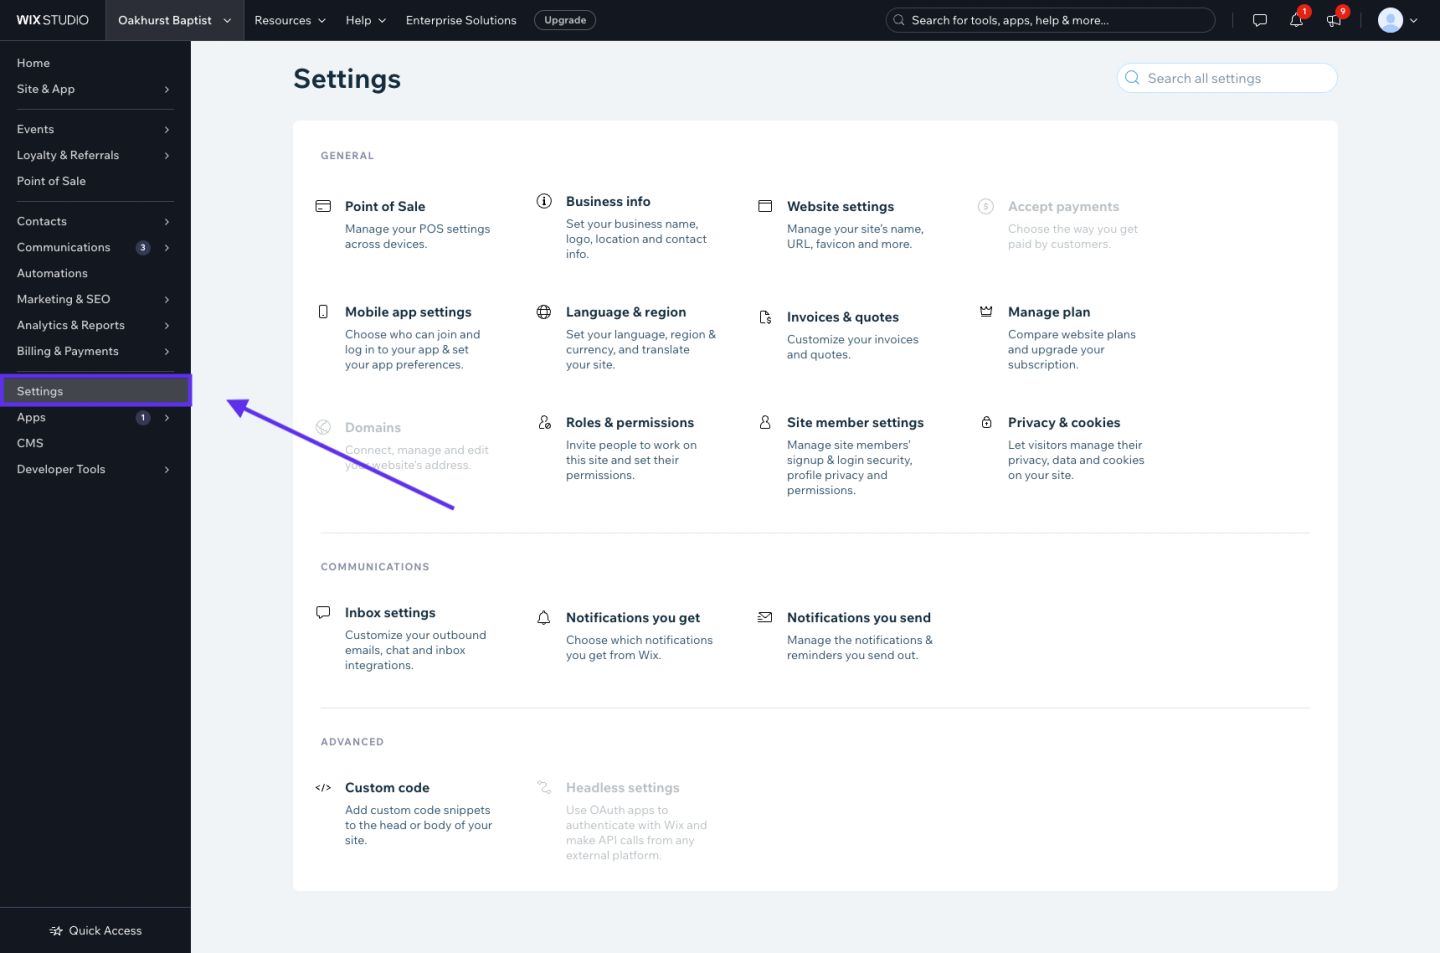
2. Navigate to the “Settings” button on the sidebar.
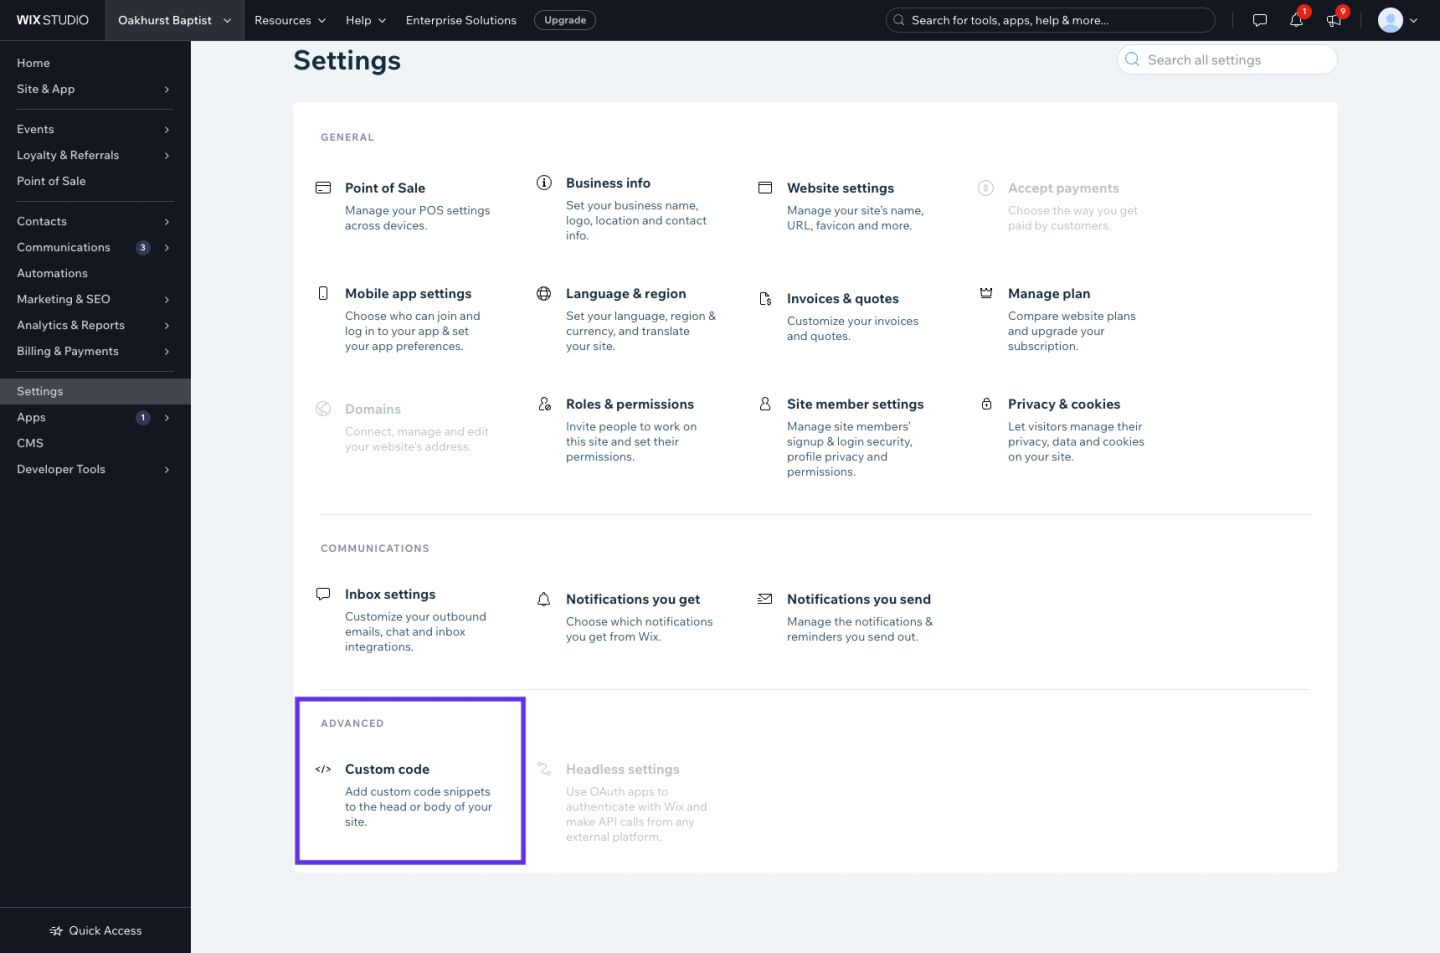
3. Scroll to the “Development & integrations” section and click “Custom Code”.
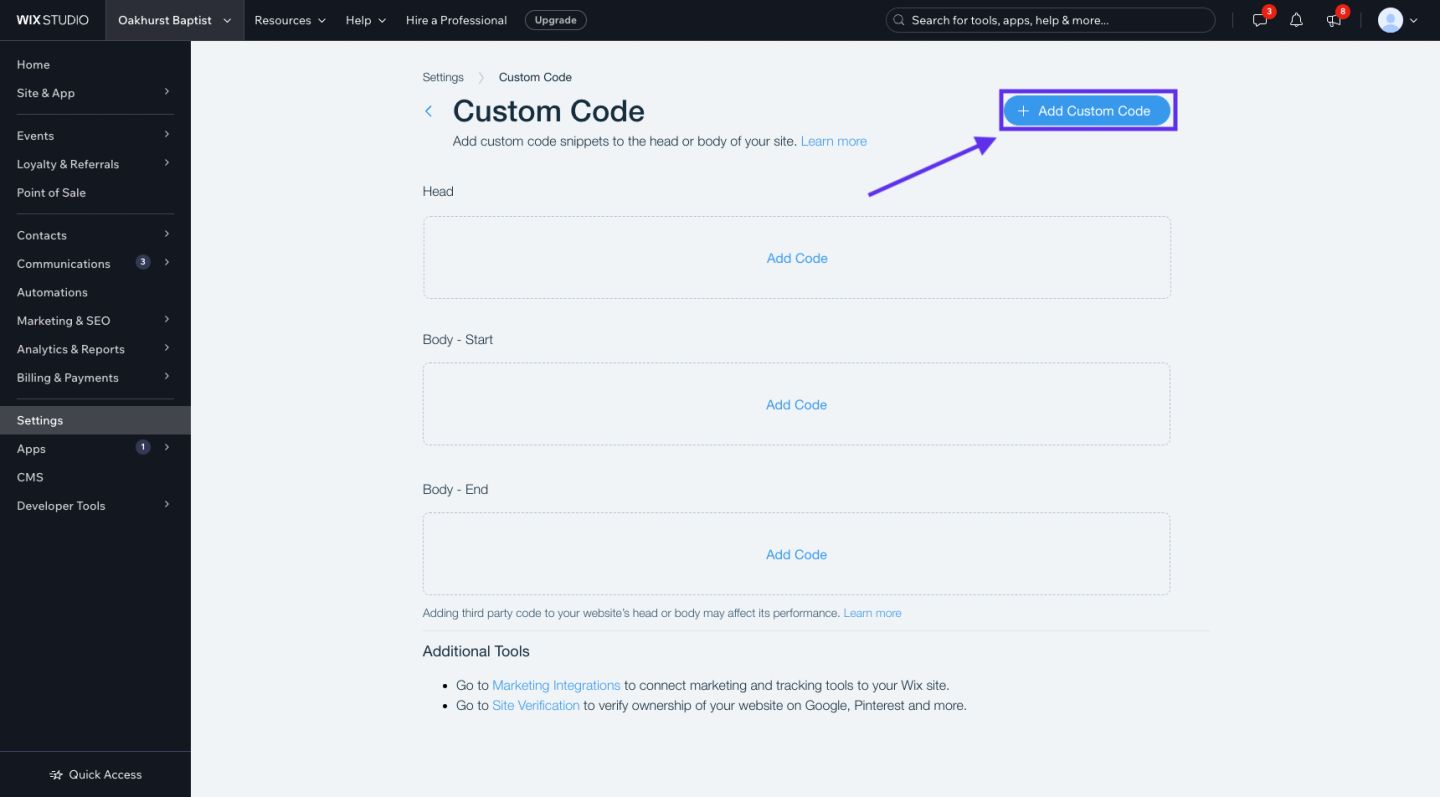
4. Click the “Add Custom Code” Button in the upper right-hand corner of the page.
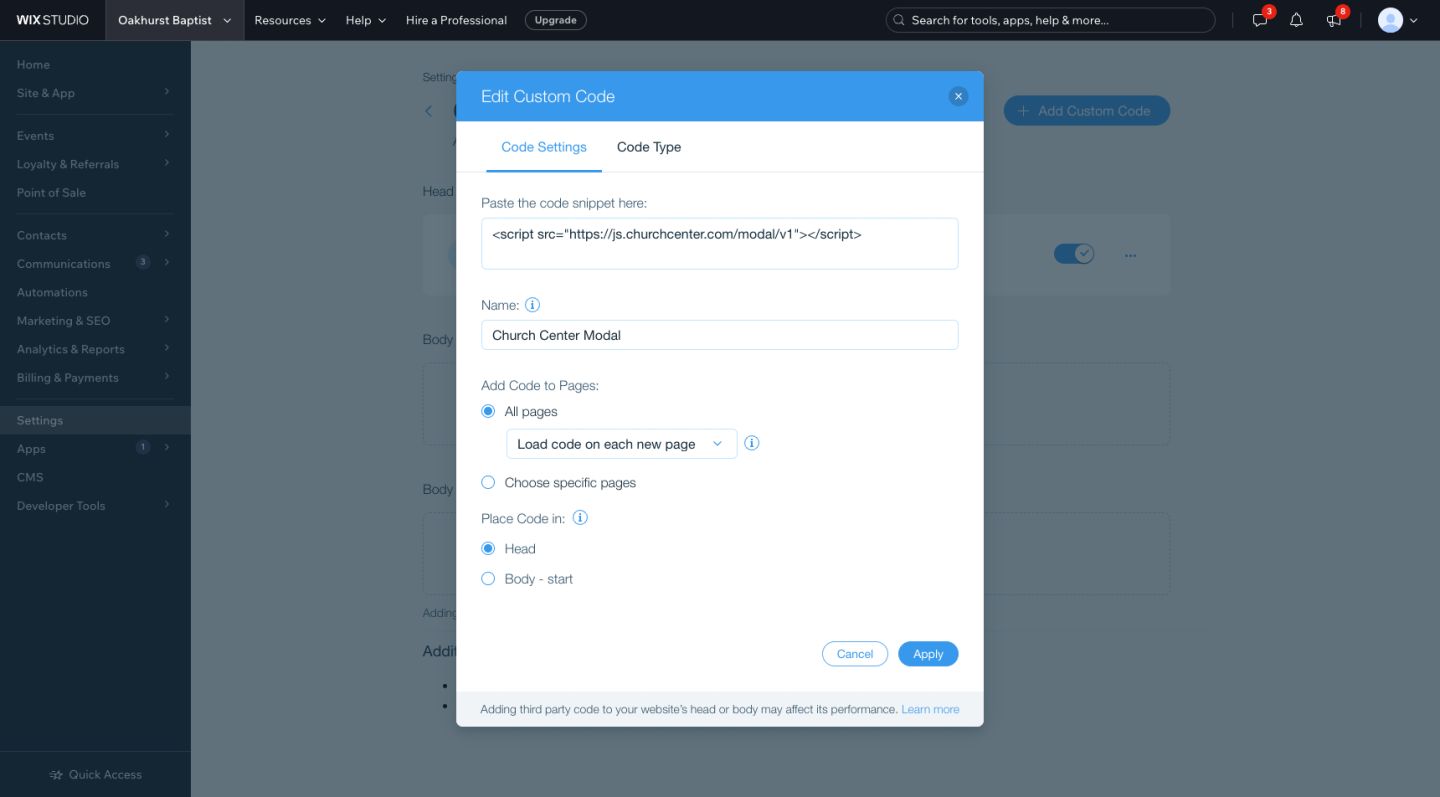
5. Paste this code snippet into the “Paste the code snippet here:” text box.
a. <script src="https://js.churchcenter.com/modal/v1"></script>
b. Provide a Name. I used “Church Center Modal.”
c. Select the “All pages” option under the Add Code to Pages section. Look to select the “Load code on each new page” option from the dropdown.
d. Select the “Head” option from the ‘Place code in’ section.
e. Click “Apply.”
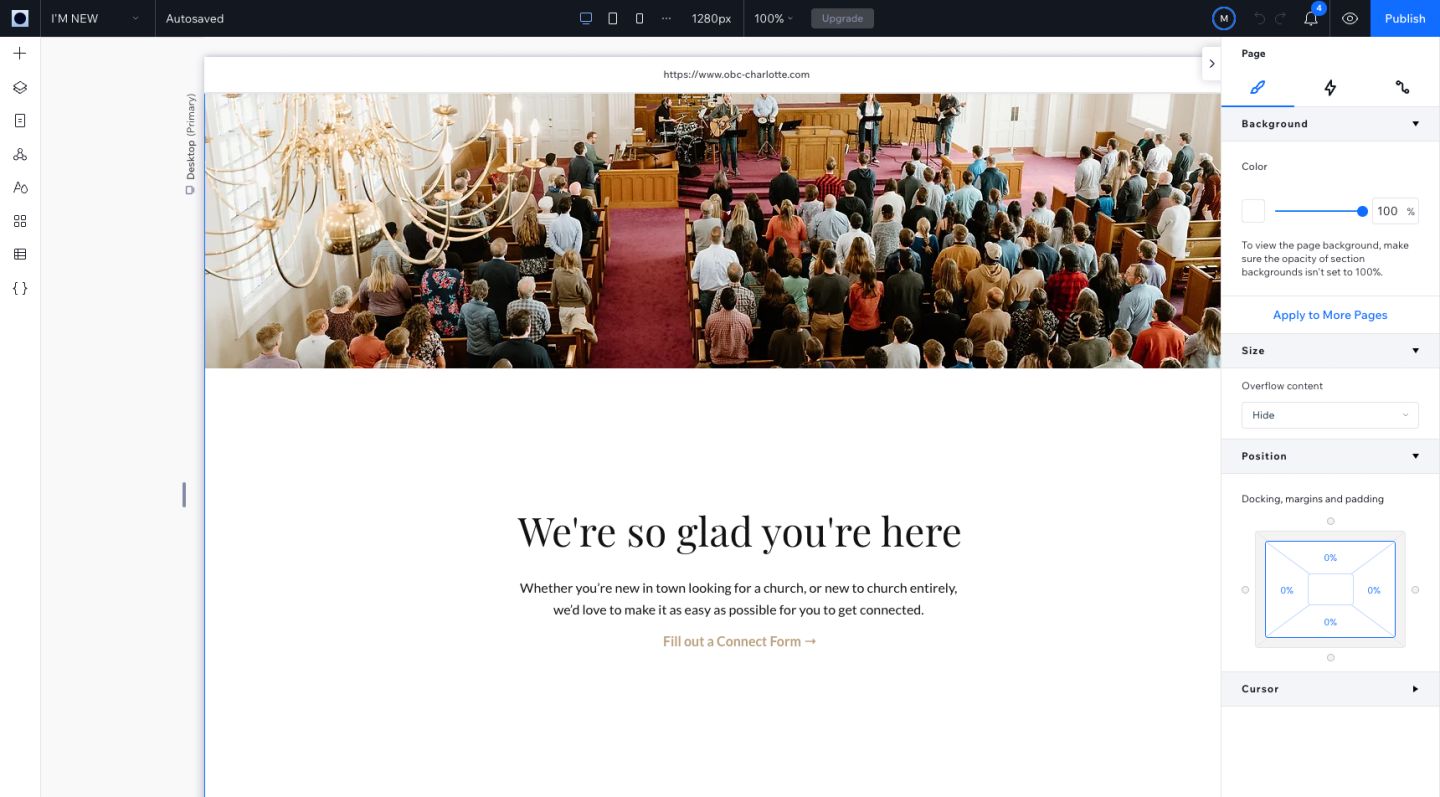
6. Create a section on the website where you want to place the button or the link.
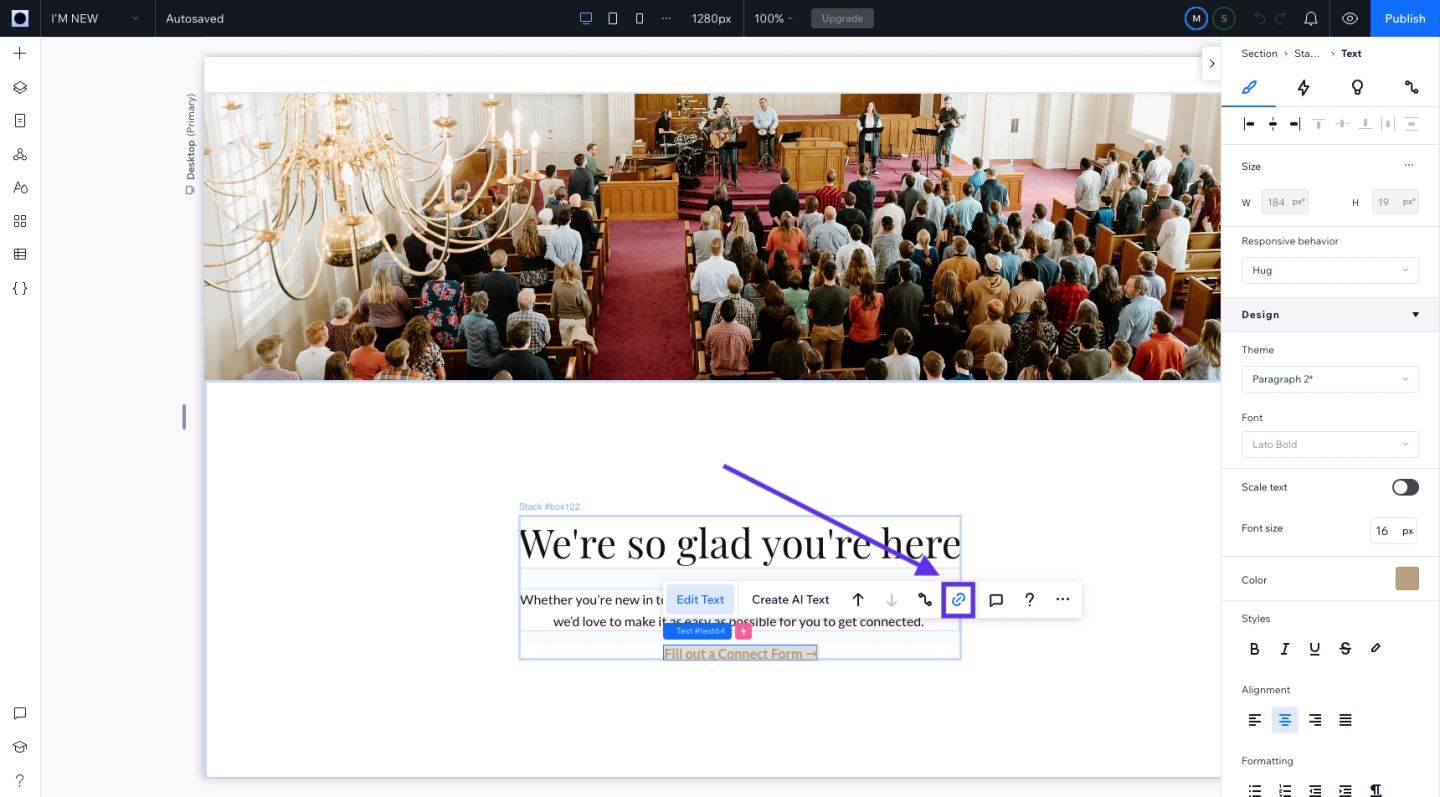
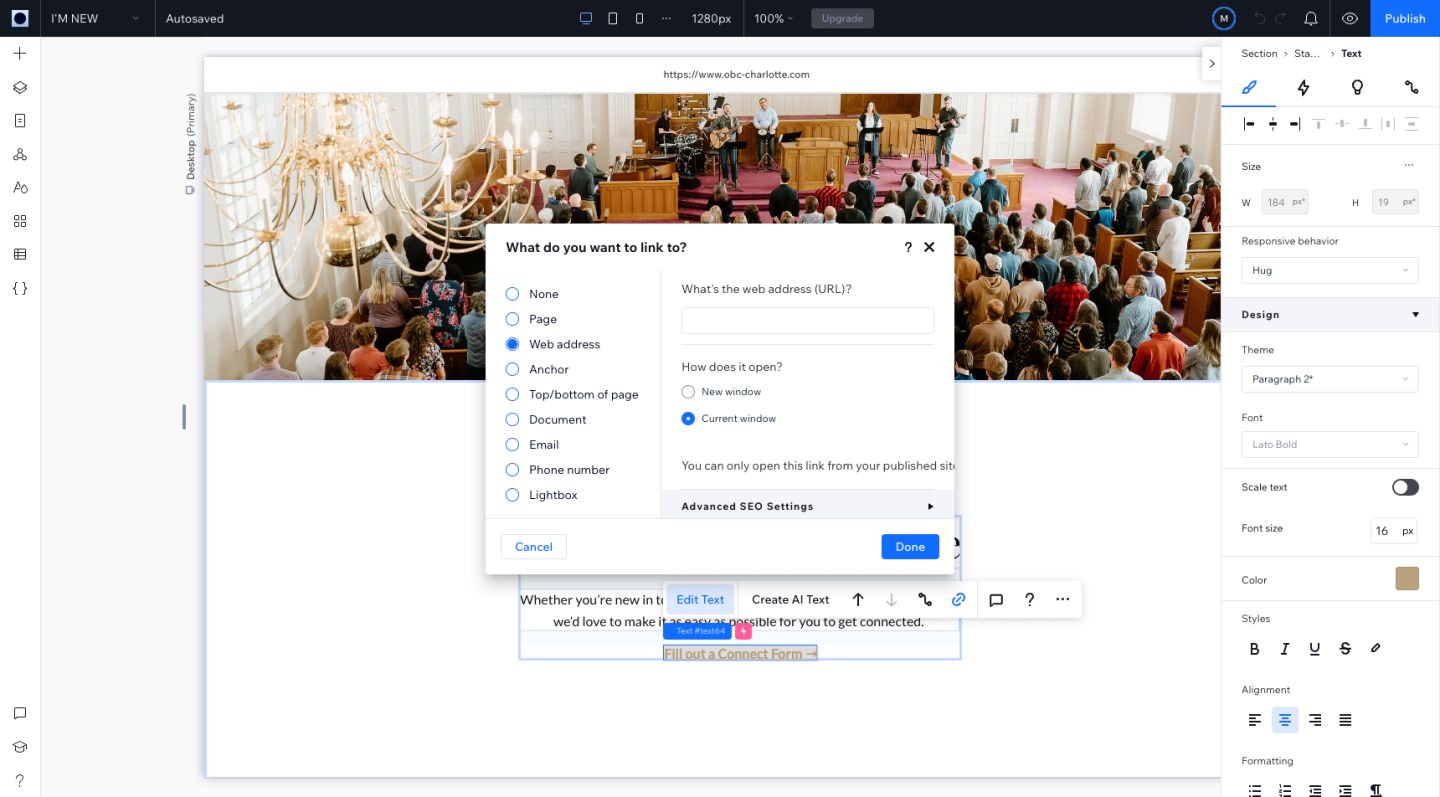
7. Add your text or a button. Then select the link option.
8. Select “Web Address” from the sidebar. Paste in your church's embed URL. This can be found in the form, under the settings tab, then click the copy it button. Make sure to add ?open-in-church-center-modal=true to the end of your URL. The final URL should look like https://yourChurchesName.churchcenter.com/people/forms/123456?open-in-church-center-modal=true
a. Click the option to open in the current window. Then click the done button.
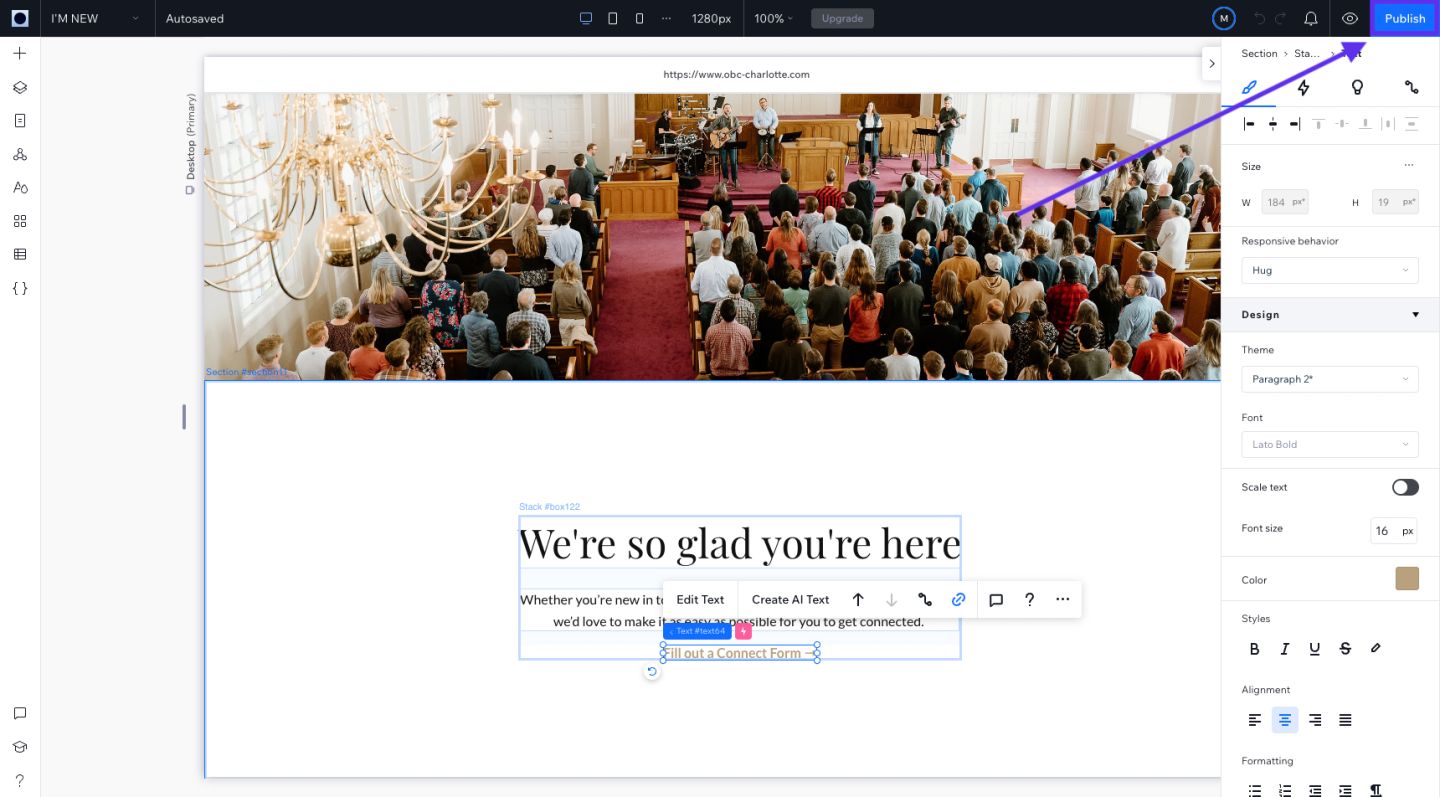
9. Make sure to hit publish, and you are done!
And there you have it — your Planning Center form is now a seamless part of your church's Wix website! We hope this guide has made the process straightforward and that you feel a sense of accomplishment. If you've tried this method, we'd love to hear how it went. Your feedback not only encourages us but also helps others in their journey. If you run into problems or need clarification, get in touch.